Disclaimer:
As with any software upgrade or new release, it is strongly encouraged to fully test the new build within your environment prior to deploying network wide. You can test the new EPS Console by completing Steps 1 - 10 (under the Upgrading procedure section). Upon completing these 10 steps, you can create an EPS Client Packager and test on a few systems within your network as you get familiar with all the new settings and configurations.
Before you begin:
1. Please make sure you save a copy of your Product Key as it will be required at the very end of the install process to activate your EPS Console.
2. A link to download the new Thirtyseven4 EPS 6.2 is available on our Downloads page.
3. Please note you can always take advantage of our Knowledge Base articles or email our technical support team at support@thirtyseven4.com for additional upgrading tips and procedures.
4. The system you select to host the EPS 6.2 Console must be configured to have a static ip address.
5. It is critical that all existing antivirus and security programs have been properly removed. You do not have to remove the current Thirtyseven4 EPS Client (the migration process will uninstall the old version and reinstall the new one automatically). A reboot is also highly recommended after uninstalling your existing antivirus application and prior to installing the EPS 6.2 Console.
6. The following Windows services must be Started and their Startup Type set to Automatic: Computer Browser and Windows Installer.
Installation procedure:
1. Download and run the EPS 6.2 setup file.
2. After running the file, the screen below will appear as the system extracts the files for installation. The title bar of this window may display the words “Not responding” (this is normal depending on what other applications and processes are currently running). Let the extraction continue until finished.

3. After successful extraction, a Welcome screen will be displayed.
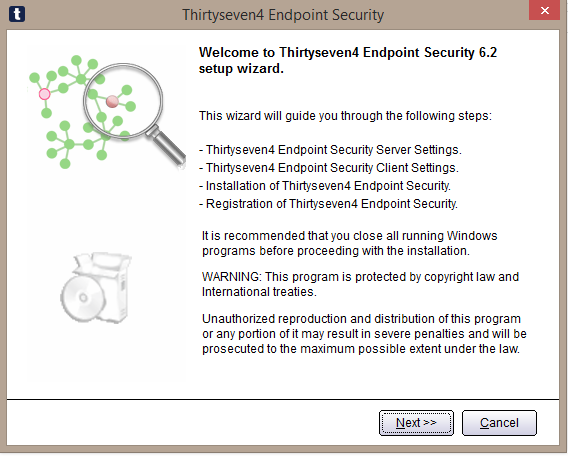
Click “Next” to continue.
4. The next screen displays the Thirtyseven4 End User License Agreement. You will have to scroll down and click ‘I Agree’ to continue.
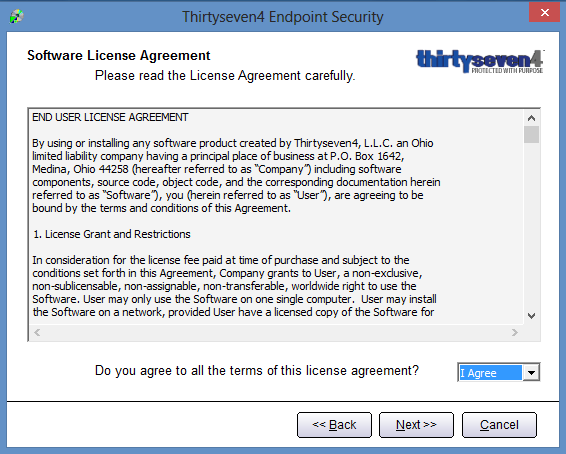
Click “Next”.
5. The next screen will ask you where you’d like the EPS 6.2 Console installed. The default location will on the C:\ drive but you can install the Console to any desirable drive (ie. D:\, etc.)
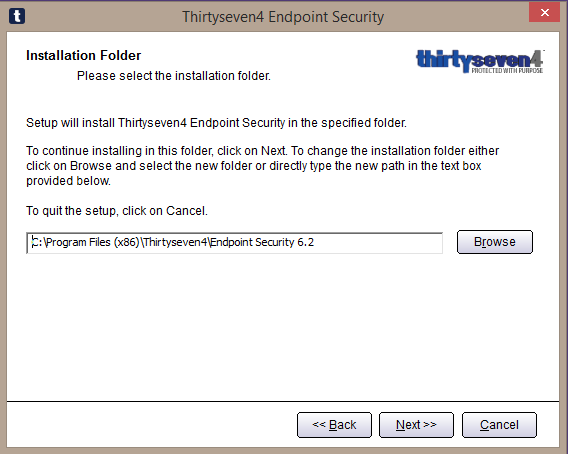
Click “Next”
6. If you are installing the upgrade on the same server hosting your existing Console, the installation wizard will detect the existing Console setup and display the following prompt during installation:
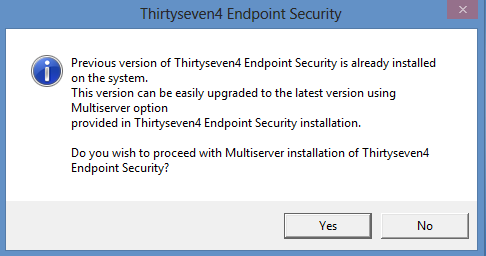
Please note: This screen will not appear if you are installing EPS 6.0 on a new server.
Click “Yes” to proceed with the Multiserver installation. In Multiserver installation mode a user will have up to 30 days to complete the migration of their existing clients to the new client.
7. The next screen prompts you to select what web service you’d like to use. If IIS is not properly configured, the IIS option will not be available. We recommend using the built-in Apache Web Service option.

Select a Web Server Installation option and click “Next”
8. The next two screen ask for port assignments. For these options, we highly recommend proceeding with the defaults. However, if the default ports are already being used in your network, you can configure any unused ports.
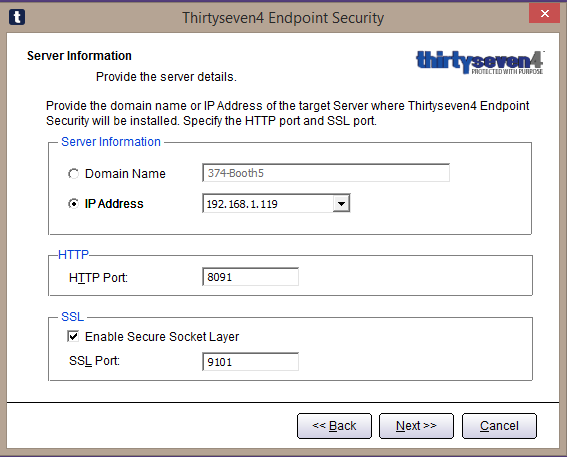
Click “Next”.
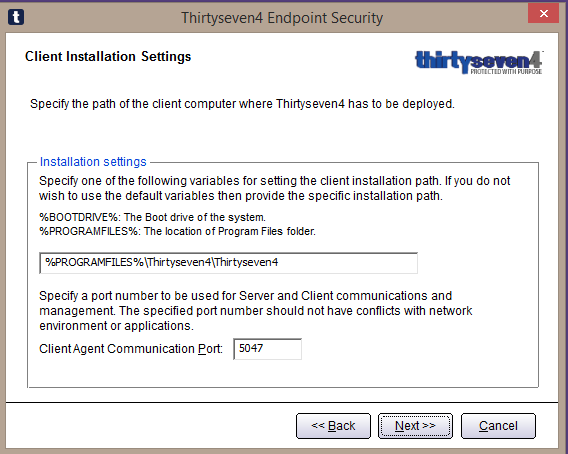
Click “Next”
9. The next screen will ask you to assign an Administrator password and a Client password. The passwords can’t be the same. Also, it is very important that you retain these passwords. If your Administrator password is lost, the only method for retrieval is to make a request to the Thirtyseven4 Support Team. They will respond with the next steps and the files they will require to complete the retrieval.
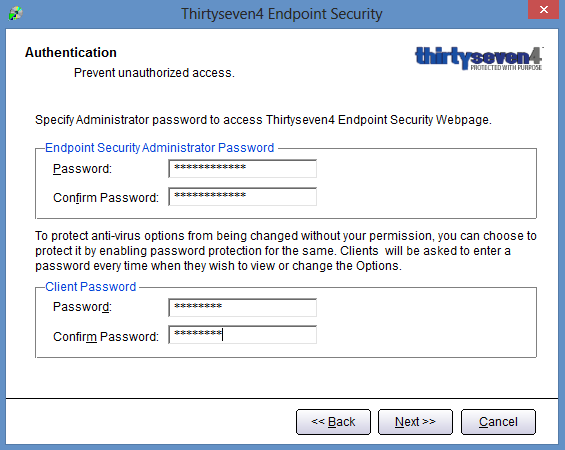
Click “Next”
10. After clicking Next, the installation will process and both the Thirtyseven4 EPS 6.2 Console and the EPS 6.2 Client will get installed. Upon successful installation, you will be given the opportunity to perform the initial update via the Update Manager.
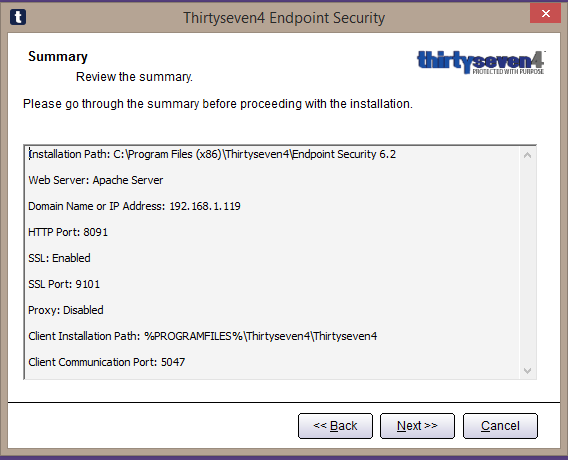
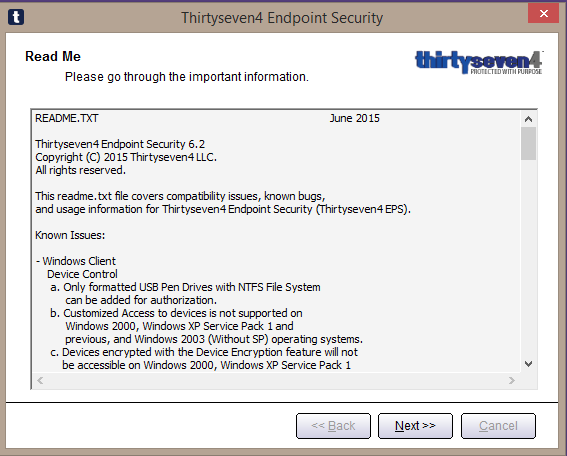
Click “Finish” at the last screen.
With the installation of the new Console complete, the next step is to open your existing (old) Console webpage and perform the following steps:
For Admin Console 4.2, 4.5 and 4.6 customers:
a) From the left side navigation, click Administrator Settings -> Admin Server.
b) Type the Server Name or ip address of the server hosting the new EPS 6.2 Console in the Server Name/IP text box. (if installed on the same Server, the ip address will be the same as the existing Admin Console version - if the new EPS 6.2 is installed on a new Server, you will need to type in the ip address of the new Server)
c) Type the port number of the new Admin Console in the Port text box (the default port assignment to the new EPS 6.2 is port 5047).
d) Click the Apply button.
This will send a notification to all the connected Thirtyseven4 Admin Console Clients about the new version of the EPS 6.2, and all Thirtyseven4 Clients will be redirected to the new Console.
For EPS 5.0, EPS 5.2, EPS 5.3 & EPS 6.0 customers:
a) From the top navigation, click the “Admin Settings” link

b.) From the Admin Settings, locate the “Redirection” navigation link on the left side.
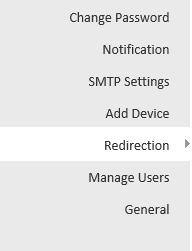
c.) From the Redirection settings -> Type the Server Name or ip address of the server hosting the new EPS 6.2 Console in the Server Name/IP text box. (if installed on the same Server, the ip address will be the same as the existing EPS Console version - if the new EPS 6.2 is installed on a new Server, you will need to type in the ip address of the new Server)
Type the port number of the new Admin Console in the Port text box (the default port assignment to the new EPS 6.2 is port 5047).

d) Click the Apply button.
This will send a notification to all the connected Thirtyseven4 EPS Clients about the new version of the EPS 6.2, and all Thirtyseven4 Clients will be redirected to the new Console.
e) Please Note: New in EPS 6.0 and above is the option to migrate select Groups of systems instead of migrating the whole network at once. The option is available here:
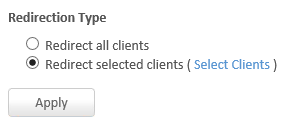
Upon successful migration, the new version of EPS 6.2 will check for any old Client Agents in the network. Upon detection, EPS 6.2 will automatically uninstall the existing old Client Agents and install new Client Agents.
Once all the Client Agents in the network are upgraded, the older version of Thirtyseven4 Admin Console or Thirtyseven4 Endpoint Security Console can be uninstalled from the server system (you can determine this by looking at the Client Reports (old AC 4.x installations) or Clients > Client Status setting (old EPS 5.x) of both the existing and new EPS 6.2). Before uninstalling the old Console write down the Product key and Activation Number of the older version of Thirtyseven4 Admin Console.
Do NOT uninstall the existing Admin Console/EPS Console until ALL systems have been successfully converted over to the new Thirtyseven4 Endpoint Security version. Please note: it is possible that not every system will move over. This is because the remaining systems may be showing Offline due to the systems being retired, re-imaged, etc.
DO NOT uninstall Apache Server during the uninstall process of the existing Console version.
Upon completion of the uninstall, reactivate the new version of EPS 6.2 using the Product key and Activation Number of the older Console version.
Things to Note:
1. Once upgrade is started, all lower version clients should be upgraded to higher version clients within 30-days (exact time depends on environment and network size).
2. If the web-based management console of the lower version of Thirtyseven4 Admin Console is configured using IIS with SSL support enabled, on Microsoft Windows 2000 and Microsoft Windows XP operating system, then configuring the web-based management console of the higher version of Thirtyseven4 Admin Console using IIS with SSL support enabled, on Microsoft Windows 2000 and Microsoft Windows XP operating system, will not be possible. In such a scenario you can install and configure the newer version of TSEP5 web-based management console with Apache Web Server.
3. If you are uninstalling the existing version of Thirtyseven4 Admin Console configured using Apache Web Server, then DO NOT uninstall Apache Server during the uninstall process of the existing version of Thirtyseven4 Admin Console.
4. The new EPS 6.2 webpage will be accessible on either port 8101 or 9101 depending on how you set up the installation.
Using Policy Conversion Tool:
Follow the steps below to use the EPS Policy Conversion Tool:
1. Open the existing EPS 5.0, EPS 5.2 or EPS 5.3 webpage
2. Go to Clients > Managed Policies > select all the policies to convert > click the Export button
3. Save the exported “acexport.db” file to your Desktop (or any other location)
4. Download the EPS Policy Conversion Tool (click here)
5. Open the "Policy format converter tool".
6. Click on the Browse button. The wizard for selecting the policy file will open.
7. Select the Policy file exported from EPS 5.0, EPS 5.2, EPS 5.3. All policies will be shown under Policy Name.
8. Click on the Convert button. It will ask for a location and name to save the converted file.
9. Enter the file name and location.
10. Click on Save button. The prompt will display "File converted successfully.”
11. You can now import policies via this file to EPS 6.2 version. The converted file can be imported in EPS 6.2. |